ABC Quick Check: B is for Brakes
The “ABC Quick Check” is a phrase to help you remember how to
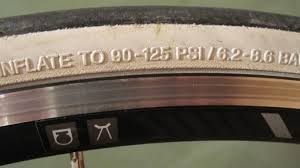
check your bike for safety and mechanical soundness. In the previous post, we discussed the important of Air in your tires, and how to maintain it. In this post, we cover the next letter.
Many kids with BMX bikes remove the brakes from them. We think this is a bad idea. It renders the bike unsafe for any riding beyond trick riding in the bike/skate park. You need to have more than "sneaker brakes" when that car is pulling out in front of you!
Basic check: Stand beside the bike and apply each brake in turn while you push it forward. The brake should hold well enough to prevent the wheel from turning. The left brake lever operates the front brake, the right lever operates the rear brake. (Remember both "right" and "rear" start with "R".)
Rim brakes may be "linear-pull", pictured here, as well as "caliper" and "cantilever". Linear-pull are most often used on hybrid bikes, calipers on road bikes, and cantilevers on mountain bikes. But they all work on the same principle, to squeeze rubber pads against the wheel rim.
In all cases, your hand brakes should provide plenty of stopping power well before the brake lever gets close to the handlebar. If you're not getting that, or if the brake lever gets closer than an inch to the handlebar, your brakes need work. Working on your own brakes is beyond the scope of this post, but there are plenty of online videos if you are a DIY person, or you can take the bike to your local bike shop.
In the case of rim brakes, you can also evaluate the wear of the brake pad. Have you ever noticed these little indentations in a brake pad?
These are there to indicate how worn the brake pad is. If the pad is worn down to the bottom of these ridges, then it's time to replace the pad. You may also hear a scraping sound when you apply the brake. Also replace the pad if it is so old that the rubber has hardened. That will not grip well enough.
Bikes for small children, and some adult cruiser bikes, may have the so-called "pedal backwards brake", officially called a coaster brake. You can tell because it has a metal arm that extends from the rear axle and attaches back to the frame. Pedaling backwards applies the brake. If a coaster brake does not work, it's probably installed incorrectly, and you should take it to a bike shop to be looked at.
Using only the rear brake is the weakest way to stop, takes the most distance, and risks losing control from skidding if you do it too quickly. Using the front brake only gives better stopping power, but also carries the most risk of going over the bars. The very best braking power, in the shortest distance, actually comes from using both brakes together, more or less equally, and carries somewhat less risk of going over the bars.
So what about that? The secret to not going over the handlebars is to lean back, to keep the center of gravity from moving too far forward. If you're braking gradually on a level surface, it's generally not a problem, if you just make an effort to keep your weight back. If you have to brake quickly in an emergency, or if you are braking going downhill, a more drastic change of position is needed. Stand up slightly off the seat and crouch as far back as possible, keeping your own center of gravity low. Try to get your butt behind the seat, and down. Doing this quickly is an emergency maneuver taught in bike classes, but you can practice it on your own, preferably in an empty parking lot, and wearing a helmet.
It's very much worth mentioning, however, that the need for an emergency maneuver can be greatly lessened by being aware of your surroundings, to avoid any last second surprises. Practice braking gradually when you know a stop is coming up.
<<< Previous Post: A is for Air Why This Blog? Next Post: ABC Quick Check: The Rest of the Story >>>
B is for Brakes
Good brakes are important. If your brakes are only partially functional, you may not be able to stop in time in an emergency situation. You cannot ride safely at any kind of practical speed without working brakes.Many kids with BMX bikes remove the brakes from them. We think this is a bad idea. It renders the bike unsafe for any riding beyond trick riding in the bike/skate park. You need to have more than "sneaker brakes" when that car is pulling out in front of you!
Basic check: Stand beside the bike and apply each brake in turn while you push it forward. The brake should hold well enough to prevent the wheel from turning. The left brake lever operates the front brake, the right lever operates the rear brake. (Remember both "right" and "rear" start with "R".)
Types of Brakes
"Hand brakes" (operated by levers on the handlebars) have two major variations, and a few lesser used ones. The major types are "rim brakes", in which a brake pad is applied to the outer rim of the wheel, and "disc brakes", in which a set of pads squeeze together on a disc attached to the hub.
|

|
| A "linear-pull" style rim brake | A disc brake |
In all cases, your hand brakes should provide plenty of stopping power well before the brake lever gets close to the handlebar. If you're not getting that, or if the brake lever gets closer than an inch to the handlebar, your brakes need work. Working on your own brakes is beyond the scope of this post, but there are plenty of online videos if you are a DIY person, or you can take the bike to your local bike shop.
In the case of rim brakes, you can also evaluate the wear of the brake pad. Have you ever noticed these little indentations in a brake pad?
 | |
| New brake pads on left, worn out ones on right |
These are there to indicate how worn the brake pad is. If the pad is worn down to the bottom of these ridges, then it's time to replace the pad. You may also hear a scraping sound when you apply the brake. Also replace the pad if it is so old that the rubber has hardened. That will not grip well enough.
Bikes for small children, and some adult cruiser bikes, may have the so-called "pedal backwards brake", officially called a coaster brake. You can tell because it has a metal arm that extends from the rear axle and attaches back to the frame. Pedaling backwards applies the brake. If a coaster brake does not work, it's probably installed incorrectly, and you should take it to a bike shop to be looked at.
 |
| Coaster brake on a child's bike |
Using Your Brakes
Does it make a difference which brake you use, front or back? Some people are afraid of the front brake, because of the possibility of pitching forward over the handlebars. On the other hand (no pun intended), the front brake actually has more stopping power. That's because as you slow down, your center of gravity moves forward, and that puts more weight on the front wheel and less on the back. And that's also why suddenly using only the rear brake makes you skid. That may be fun to do if you're a kid with a coaster brake, but it's also not a very controlled way to stop.Using only the rear brake is the weakest way to stop, takes the most distance, and risks losing control from skidding if you do it too quickly. Using the front brake only gives better stopping power, but also carries the most risk of going over the bars. The very best braking power, in the shortest distance, actually comes from using both brakes together, more or less equally, and carries somewhat less risk of going over the bars.
So what about that? The secret to not going over the handlebars is to lean back, to keep the center of gravity from moving too far forward. If you're braking gradually on a level surface, it's generally not a problem, if you just make an effort to keep your weight back. If you have to brake quickly in an emergency, or if you are braking going downhill, a more drastic change of position is needed. Stand up slightly off the seat and crouch as far back as possible, keeping your own center of gravity low. Try to get your butt behind the seat, and down. Doing this quickly is an emergency maneuver taught in bike classes, but you can practice it on your own, preferably in an empty parking lot, and wearing a helmet.
 | |
| How to avoid going over the handlebars |
It's very much worth mentioning, however, that the need for an emergency maneuver can be greatly lessened by being aware of your surroundings, to avoid any last second surprises. Practice braking gradually when you know a stop is coming up.
<<< Previous Post: A is for Air Why This Blog? Next Post: ABC Quick Check: The Rest of the Story >>>


Comments
Post a Comment